Hey folks. I created a page on Facebook for my tree activities. I plan to use that primarily as it’s just easier. Thanks for sticking around!!
Finally Repotting my Water Elm
I’ve really been looking forward to this. I collected this tree in June of 2014 in the South Carolina swamp.
It looked like this when I got it home and potted up. And that beer was well deserved.

I just let it grow and hedge trimmed it for a couple of years. The last time I posted about it was February 2017 when it looked like this.

Yeah…a little like my son’s hair when he wakes up in the morning.
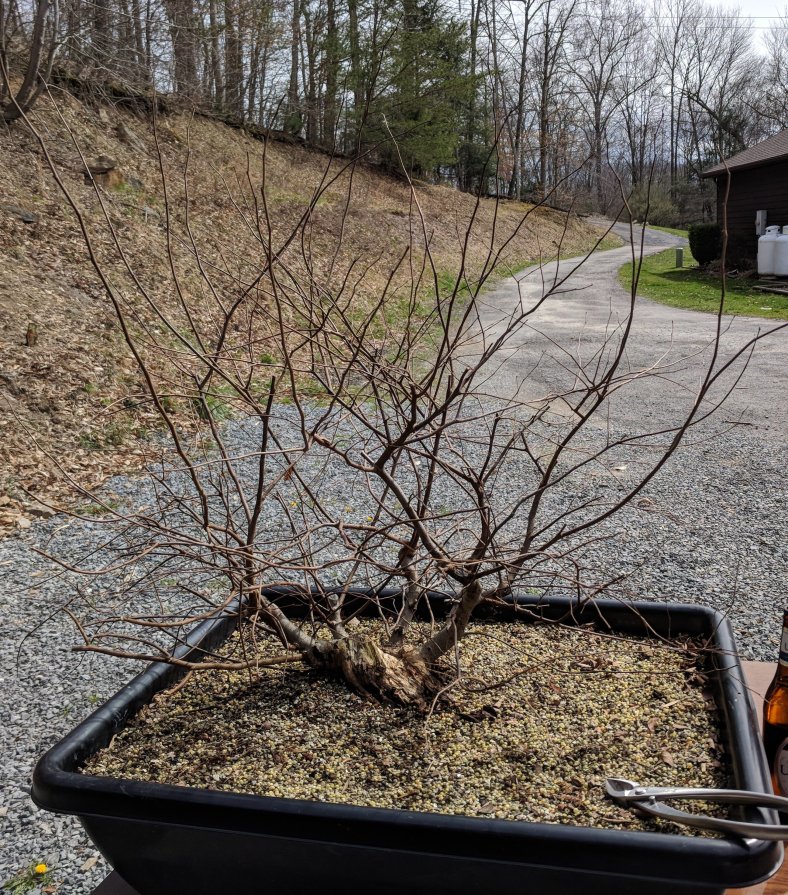
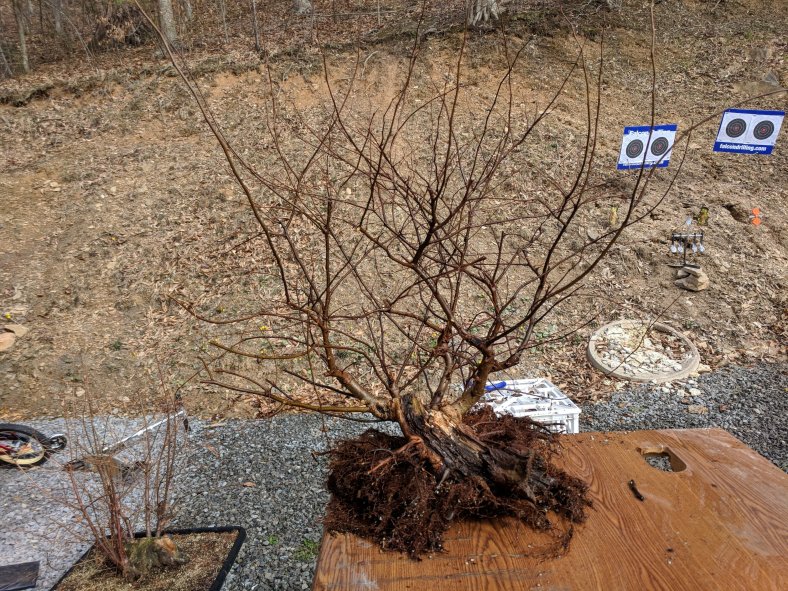
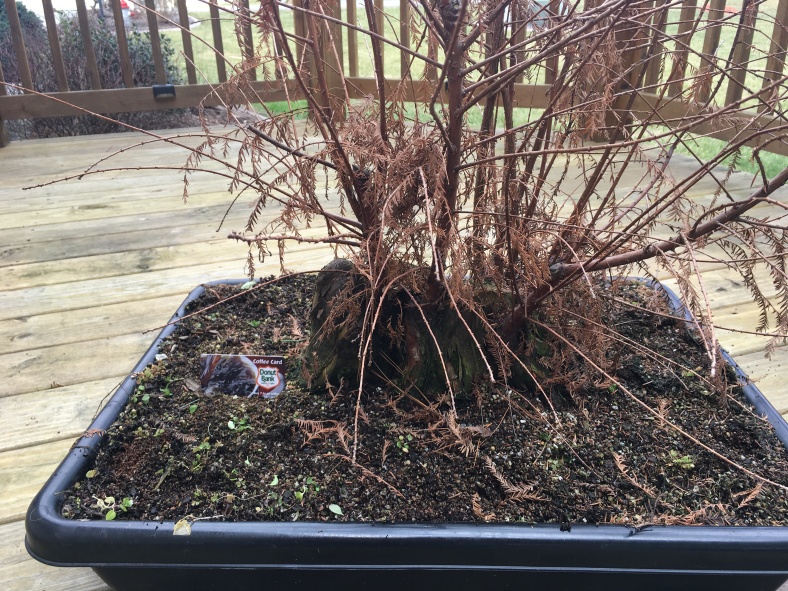
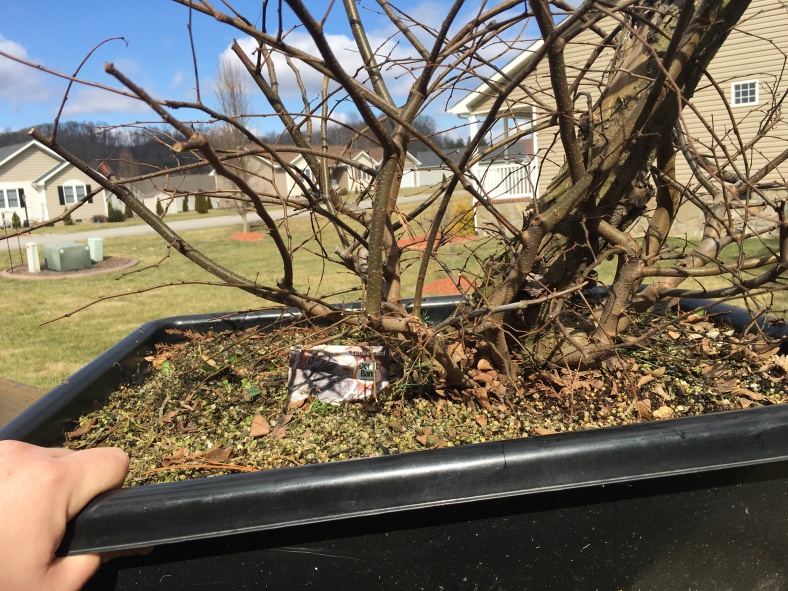
This is how it looked when I started (the back side from the above view). I have a lot of branches to work with, but they’re just too long and spindly. I want to bring everything back closer to the trunk and start over.
The main trunk fell victim to my nephew and snapped off last summer.
I think he helped me out. I wasn’t sure what to do with that trunk anyway since I’m no carving expert. So now we’ll just work with what we have.
So let’s pull it out and see how the roots are looking.
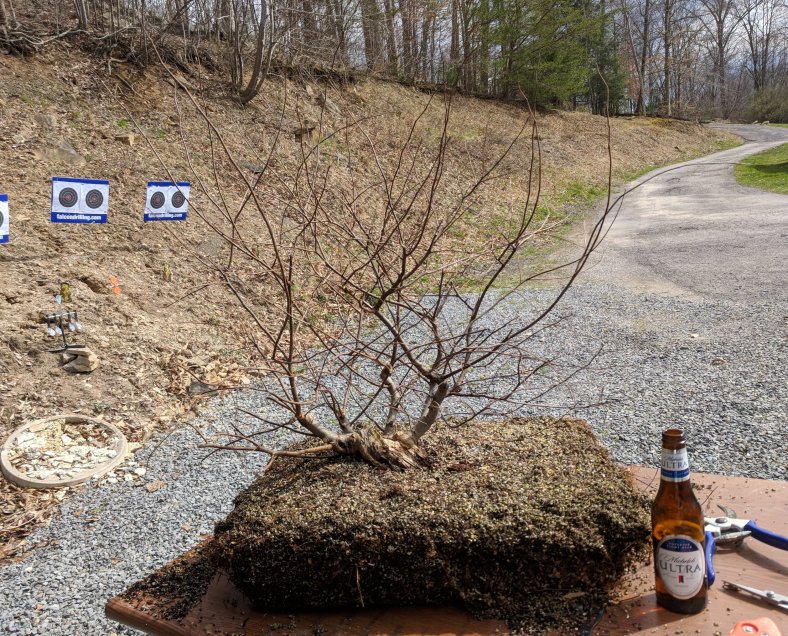
A solid block of roots…that’s a good sign. It took some work to pull it out. With this type of tree and how strongly it was growing, you can be pretty brutal.
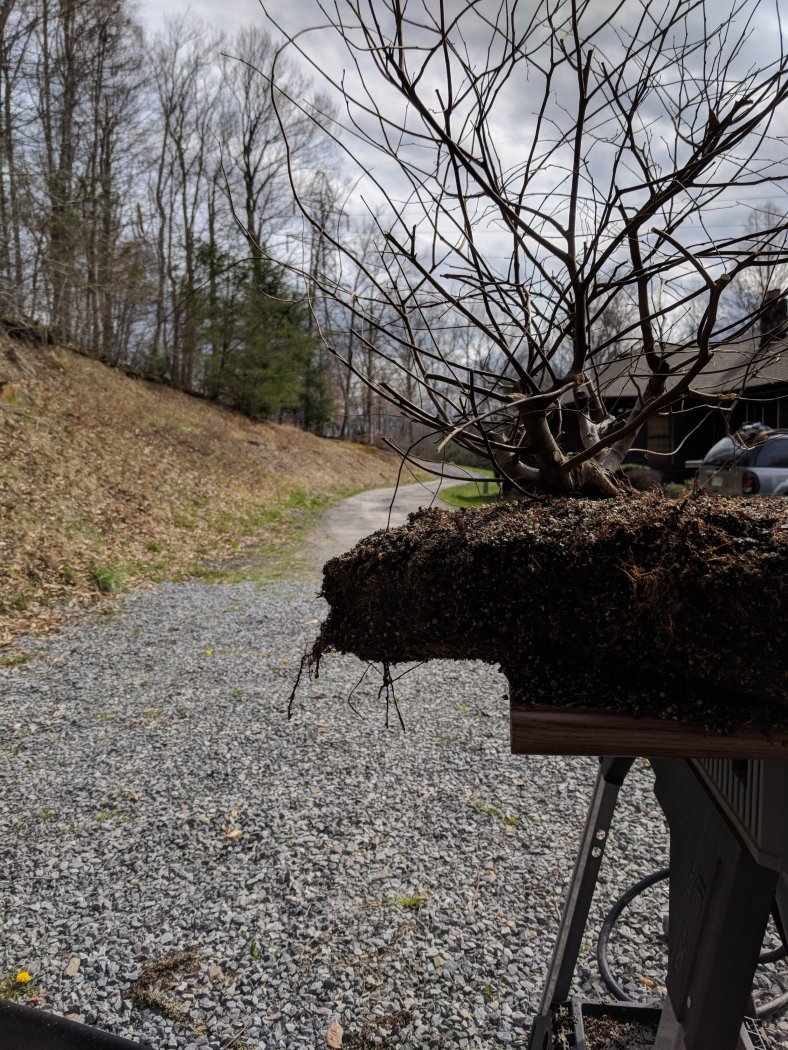
So I grabbed my saw and went to work just cutting it to a smaller square, and then cutting about 2 inches of depth off.

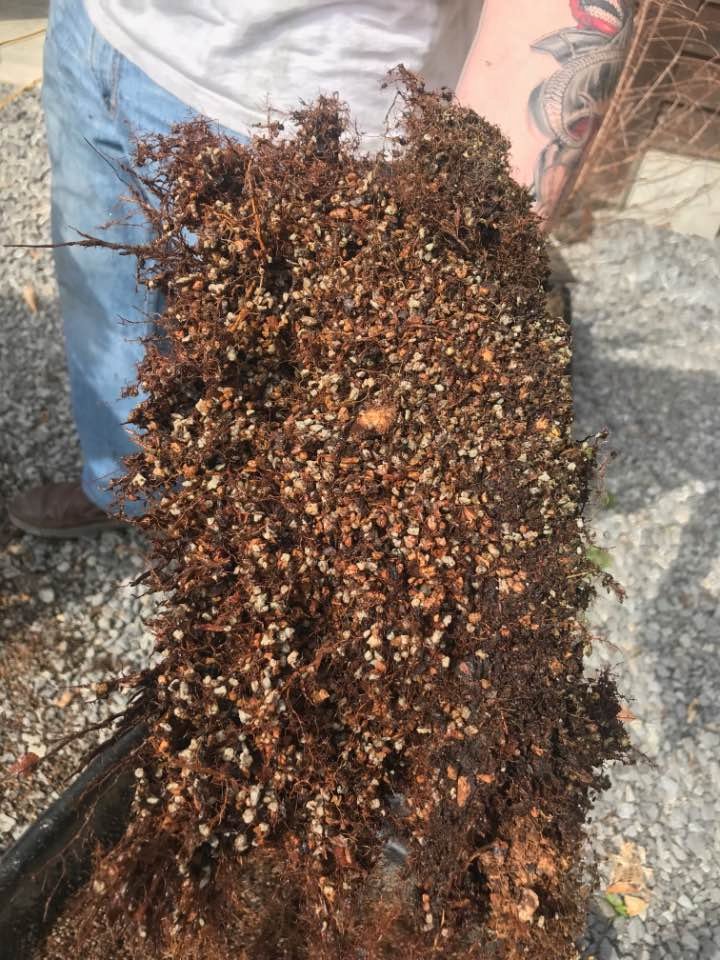
Spray it with the hose, chop back, repeat. And then…

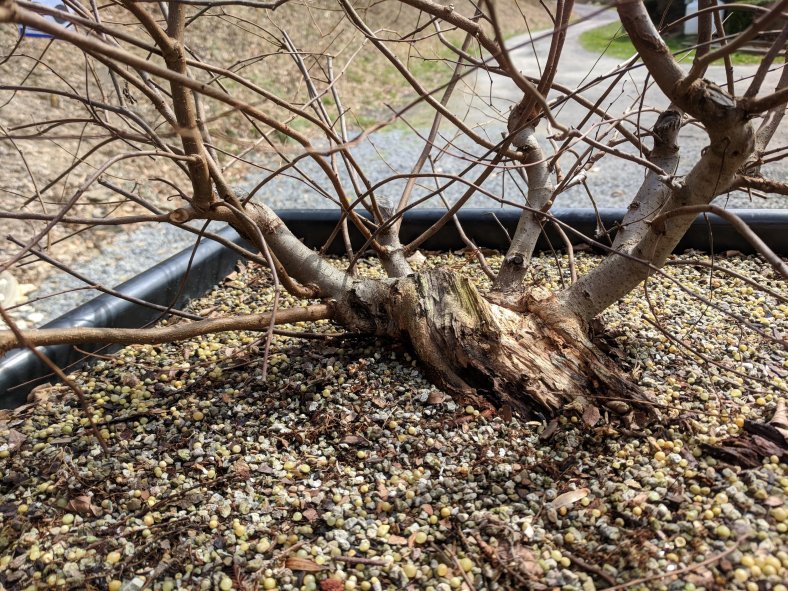
Wow…I couldn’t believe that deadwood under the soil line. That will be a great accent to this tree once I get a little further along.
And while deadwood is awesome, I don’t want it under my soil where it will stay damp and invite all kinds of pests and things that I don’t want ruining the party.
I left more thick roots that I would have liked, but I didn’t want to remove too much. Next time I repot, I’ll work on that.


Got it wired into an old grow box that I had laying around. I had planned to work it into it’s first bonsai pot, but shit happens. That deadwood under the soil was a surprise and I didn’t have one that would accommodate it. I’ll be on the lookout for one.

All wired in and ready to be cut back.

And the finished project for now. This thing grows like wild so I will be working on cutting it back and wiring this year. Wish me luck!
I worked on a landscape azalea this week so be on the lookout for that in the next week or so.
Local Fall Collecting
My family and I bought our first home this year with a couple acres of woods around it. As us tree folk tend to do, I wondered around several times looking for local native species that I could work with.
Today the kids were content and I stared at the hillside too long with nothing better to do. My hands were itching to get dirty.

Here in Southwest Virginia, American Beech are everywhere. Fall isn’t the most popular time for digging but I’ve had many forum friends with success this time of year. Within 10 or 15 minutes I found many trees that looked like they may be workable, but unfortunately, most were sucker growth from larger trees nearby.

The smaller tree at the far left was one I had my eye on.

As I got the leaves raked away, I could see it had no roots of its own. I did some research and read this was very common in thick cover as they can’t survive the competition when growing from seed.
So, I continued my search while enjoying the nice weather with some good company. My old man Buzz…

And the new guy in town, Lego.

Better hide yo girl…
I came across another good looking tree.

I liked this one because of the way it grew on the edge of the bank. It had less competing roots and thought it would be easy to get out.
I cut the backside and realized that it was also a sucker growth. But since I already had it out of the ground, I decided to cross my fingers and hope for the best.

It did have some of its own roots but I’m not sure if there were enough. Time will tell.
I found a few others that I decided to dig. While not mind-blowing, now that I am back in VA for good, I want to work with local trees. These will help me learn how to manage American Beech since I’ve never had one before.

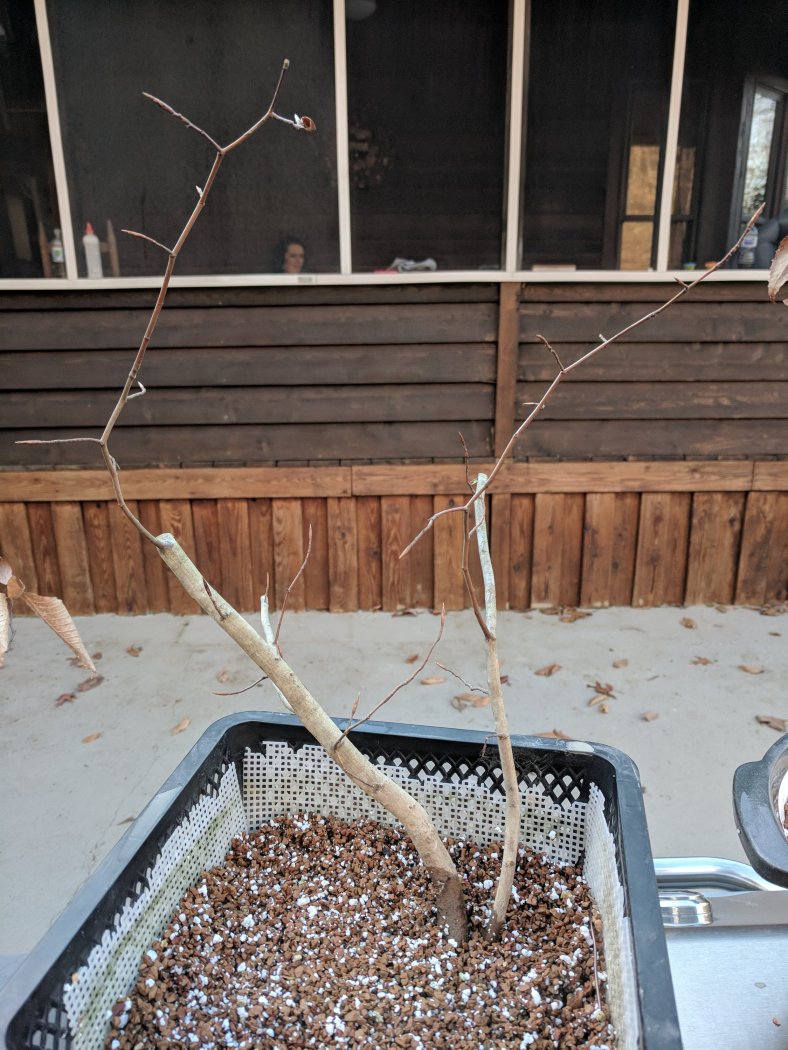
The one on the far left seemed to be the best candidate for work next year. It had low branching, some taper, and was unique with the smaller dual trunk.

Roots could have been better, but I had less on others I found today. I grabbed a pond basket, got it wired in with a turface/perilite/pumice mix, and chopped it back a bit.

In all, I potted up 4 trees after digging 6. The other 2 didn’t have enough roots to waste the time and supplies on.

Keep your fingers crossed for me and I’ll update next Spring if they make it.
Upcoming Projects This Spring
It has been an interesting couple of months. I have moved a few states away and took my trees along in a U-Haul. I decided to go out today and pull some of the old weeds that were starting to turn green and figure out what I needed to work on most this Spring.
First up, an Arakawa I picked up last year that needs some work. You last saw it here when I tried to air layer one of the upper branches.

I will let the lower branches run to thicken up this year and then remove a lot from the top after the new growth hardens off. I wanted to leave this a bit taller and even though it lacks some movement. I got a couple of a couple of cuttings to root from last year so I will try to get a few more.
Next up is an old Arakawa that I have had for several years. I thought it was going to die a couple of years ago but it held out. I gave it a couple years of growth without any work following an old attempted air layer.


It is in desperate need of a repot and removal of some old dead roots. I need to clean up the stump on the secondary trunk as well.
Next up is a Bald Cypress that I collected in South Carolina about 3 years ago.


Last year I had to make a serious and unexpected chop following an insect infestation. It responded well and finally needs some root work. The base of the tree is so large that I will just put it back in this container for several more years to let the new leaders thicken. I am thinking of a unique clump with some carving to clean up the chop wound. This will be a long process, but I am excited about this one’s potential.
Next up is a red maple that I received from a friend. I know some have mixed feelings about these due to their leaf size but I have had fun with it.

I will do a repot and chop my primary branches back. It also has an older chop wound that is healing nicely.
I will cut around the edges of the wound and apply some more paste this year and hopefully it will be closed by the end of the year.
Last on the menu is the water elm I collected along with the BC. It has grown very well and finally needs a good hard chop. The upper trunk is dead and could use some carving but I don’t think I am ready to tackle that yet without some practice.
There are plenty of good thick branches down low to work with. I will cut them back and work towards secondary branching this year. I haven’t seen the roots on this tree since I potted it so who knows what I have to work with down there.
I have some others needing to be repotted and I hope to get many of my trees in bonsai pots for the first time. Stay tuned for an update.
Air layering an Arakawa Maple
First off, I changed the title of my blog from sikadelic’s bonsai blog to Gray St. Bonsai. Nuff’ said there. On to the work!
I used my trusty tailgate workbench again (my wife cleaned up the garage and I’m waiting for the kids to dirty it up before I add my mess). The tools of the trade from left to right: a Ziploc bag and zip tie, long strand spaghum moss, plastic wrap, grafting knife, and a bucket of water. And oh yeah…the tree of course.

Today I’m working on an Arakawa I purchased from Martin Sweeney. He’s a private seller who has some great stock and very considerate of his customers. It is a bit tall which actually drew me to the tree. It has a lot of options but is limited by the forking branches…hence my desire to layer one and start building a nice feminine figure (settle down).

The nebari will likely need some work but I haven’t reported it yet. I look forward to reporting it next year and seeing what’s under there.

I bought this moss off Amazon for about 8 bucks. It came in a 1 pound bale which is a much better deal than buying a small amount from your local box store.

I grabbed a few handfuls and threw it in my bucket of water to get nice and wet.

Swim around in there a bit and check for stalks that can poke a hole through your bag and be a general pain in the ass.

I used my grafting knife to make two rings about double the width of the branch I am working on.

Scrape away the cambium and make sure to get down deep enough that it won’t grow together and heal itself.

I got my bag where I wanted it and used the zip tie to hold it in place. By the way, those things are handy. I recommend having a few sizes on hand. They’re helpful for all sorts of things.

I added the moss to the bag a little at a time to get a tight fit. Make sure to squeeze out the excess water. Once I had a good softball sized wad of moss around the cut, I wrapped it tightly with plastic wrap to hold everything in place.

I left the top open so the moss can stay damp when it rains or I water it. I also poked holes around the bottom so it could drain.

Now it’s off to the shade for a week or so before heading back out to the bench. I’ll give an update when I see some progress.
A hard trim on a gnarly Arakawa Maple
I’ve had this tree for a few years and it’s been through the wringer. I had initially tried to air layer and thread graft the tree last year but it failed. It died back quite a bit resulting in a pretty gnarly appearance. To be honest, I didn’t think it would survive and left it alone aside from feeding and watering until this past weekend.

It was growing very well and looked to enjoy the time off so I figured it was time to give its first real cut back to build a structure for the tree.

This straight branch was an eyesore for me and I didn’t want to chop it all the way back. I didn’t have any wire strong enough to hold it so I improvised.


I would like to get some buds to pop on the right side of the main trunk. I’ll feed it pretty heavy and hope for the best. I’ll also thin out the apex a bit later this year.
Korean Hornbeam Group
It was finally time to make a real purchase of a trained tree grown for bonsai purposes. Until now, all of my trees have been nursery projects or collected trees. I feel comfortable enough in my skills now to spend a bit of money and get something nice. I scoured the usual online sources to see what was available in my price range before heading out to Bogan’s Bonsai. We have our monthly study groups there and the owners could not be better people. Besides, it is always better to support your local folks.
I was intentionally shopping for a hornbeam or maple and found this really nice 3 tree group planting.

Front

Back
This is a great start to a great piece and I am really excited to work on it. As with anything, it is not without its flaws and needs a bit of improvement. I will reduce the height a little bit and will need to improve the base unless there is something nice hiding below the soil line.
I will take it to the study group next weekend for a light trim and some wire.
A little work on an Arakawa Maple
I picked up this tree around mid-Spring of last year. When it arrived it looked like this.

There are some things I really like about the tree but a couple improvements are definitely needed. First off, the base is awesome.

I really like the bones I have with the twin trunk design but I have no taper and no movement. Luckily that is something that can be fixed with some patience and a little work.
My first course of action is to get an air layer going on the top. This looks like a pretty good spot.

You may think I am crazy for choosing this place due to the big scar from an earlier chop, but years from now when the new tree is established, I can carve it out and make it a focal point.
Ok, let’s get started.
I scored the bark and put my bag in place. I didn’t have a picture of this but I made sure to smear some rooting hormone all around the upper part of the wound. Some say it isn’t needed but I always like to use it just to get that little extra help. It makes me feel better at the very least.

I didn’t have any moss so I am trying something new and using pure vermiculite. I had plenty on hand and I know it stays pretty damp so it should work fine. I soaked it in some water before applying it to the tree.

This part was a pain in the ass. I had it all over my bench when I was finished, but alas, it was done. I put a bit of wire lightly around the top and wrapped it with saran wrap.
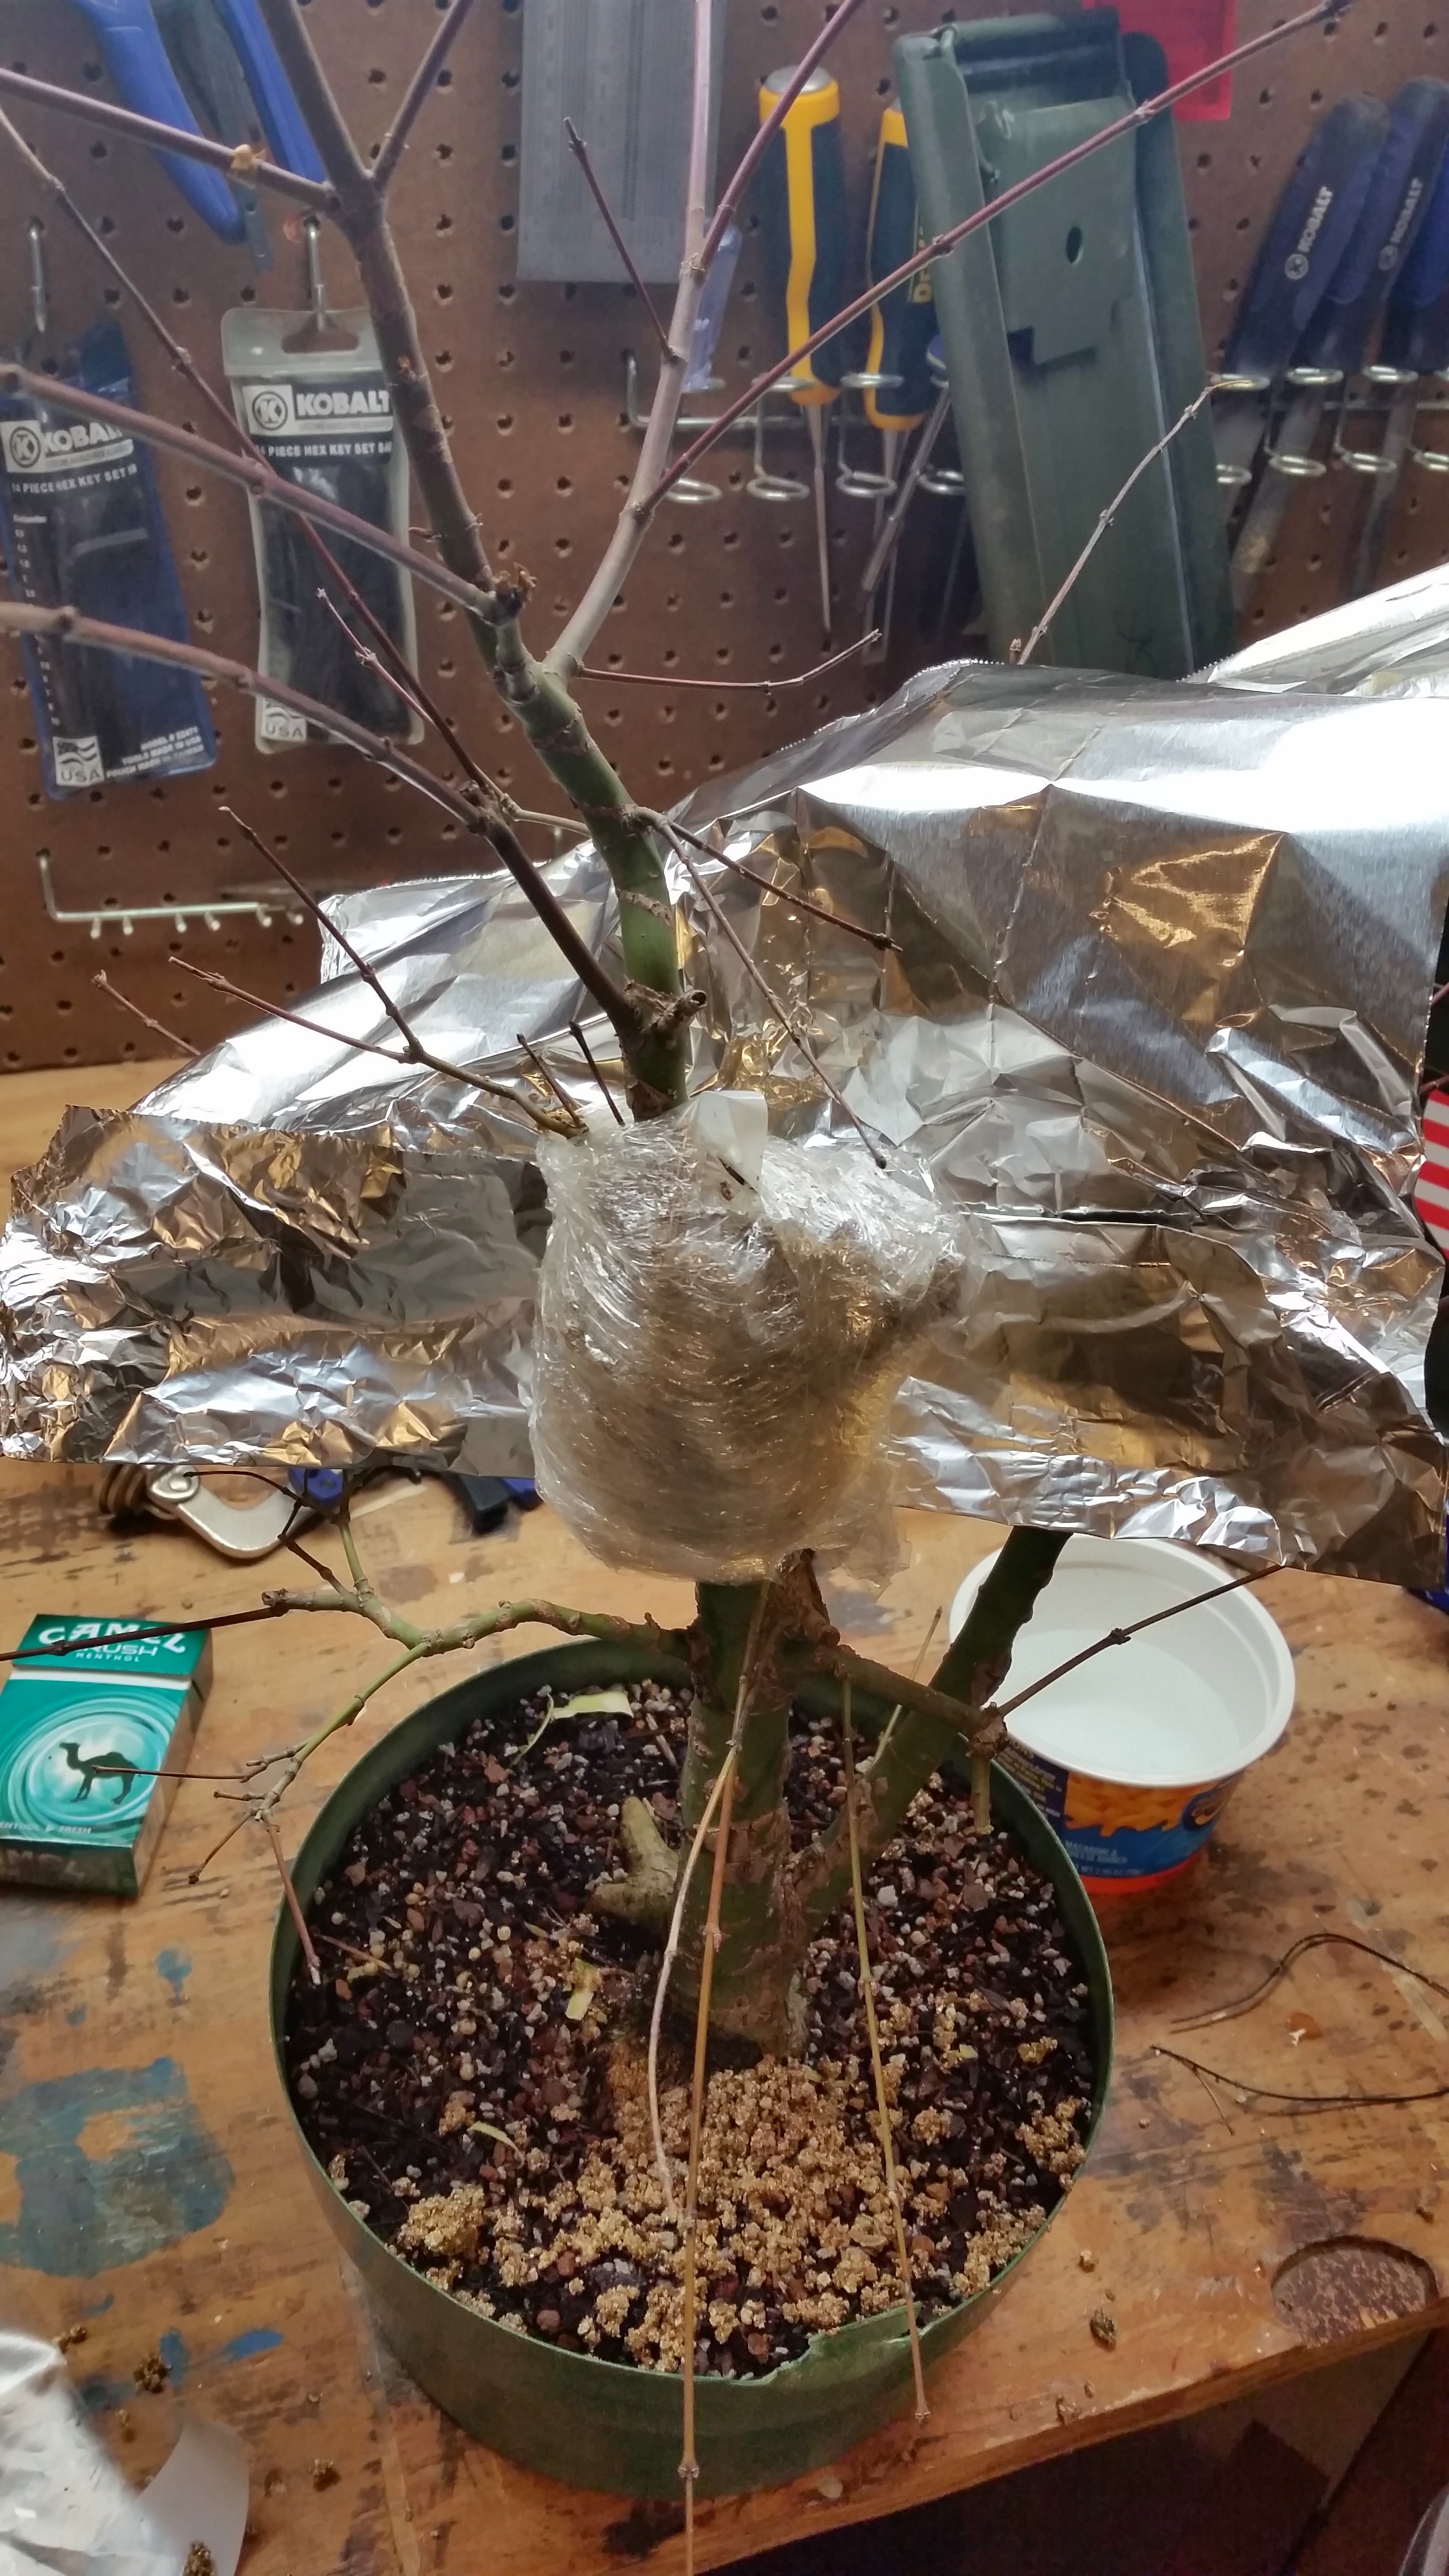
I added a layer of aluminium foil to keep the sun from cooking the fresh roots when they start poking out.

I went ahead and made a thread graft on my right trunk. Unfortunately, the small branch was already dead and I didn’t know. The tree suffered a bit through the cold weather and died back.

A month or so later I realized the branch was a goner. No worries! I will just give it another try a bit lower down. I drilled a small hole through the center of the trunk section.

The tree was already in full leaf so I had to trim the existing leaves off to fit through the hole. I trimmed the petioles (the piece that stem that connects the leaf to the branch) much closer than this picture shows.

I gently pushed it through the hole and covered the entrance and exit points with cut paste to hold in the moisture while it heals. These are pictures from my first failed graft since I can’t find the new ones. I followed the same exact process though.


All done!
I had not repotted this tree at all since I bought it and I noticed that the water wasn’t soaking in very well when I would water it. I intentionally didn’t repot this year so I wouldn’t slow the tree down. I thought I would go ahead and slip pot it while it was in the garage for the graft.


I had a pond basket laying around so I popped it in there, backfilled with soil to fill in the gaps, and back out to the bench!

I would normally be giving it a haircut right now, but with the air layer and root graft in place I want to just let it grow as much as possible.
I know this post shows a lot of work and would be pushing the limits of the tree’s health if I did it all at once. Please remember that the air layer and new graft/slip pot was performed about 2 months apart.
We’ll check back in a couple of months and see how it is coming along!
Back to the drawing board

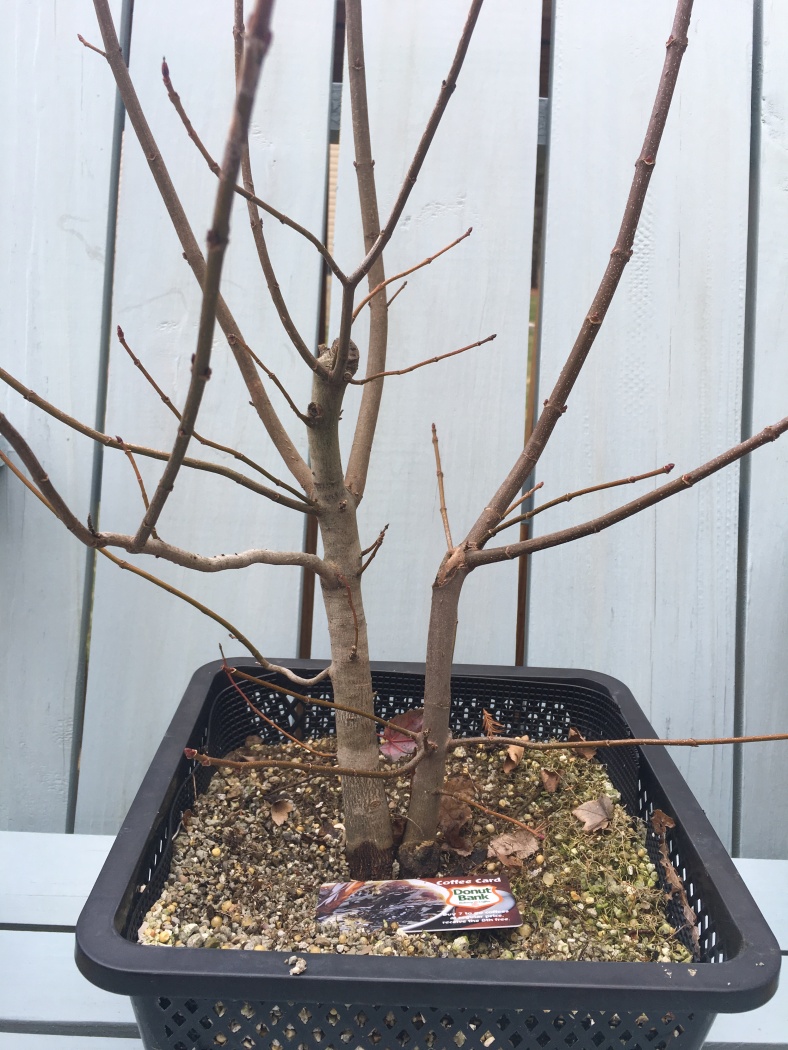
The last time I wrote about this tree was here. I just purchased this tree last year and had cut it back pretty far when repotted it from what I think was a 3gal nursery container. I let it grow freely all year without doing any additional work to it.
After getting another year under my belt and gaining more of a critical eye I can see I didnt do enough when I chopped it. I also made the mistake of letting it grow all year without trimming it a few times. Now I’m left with straight braning with no small shoots near the trunk. Just long, leggy, growth with no ramification gained. Shit.
I also don’t like the forking branches that are relatively similar in thickness. I need one to be more dominant than the other and right now it’s just uninteresting. The tree only has 1 season of training so I’m not expecting a perfect tree at this point but I want it to get started on the right foot.
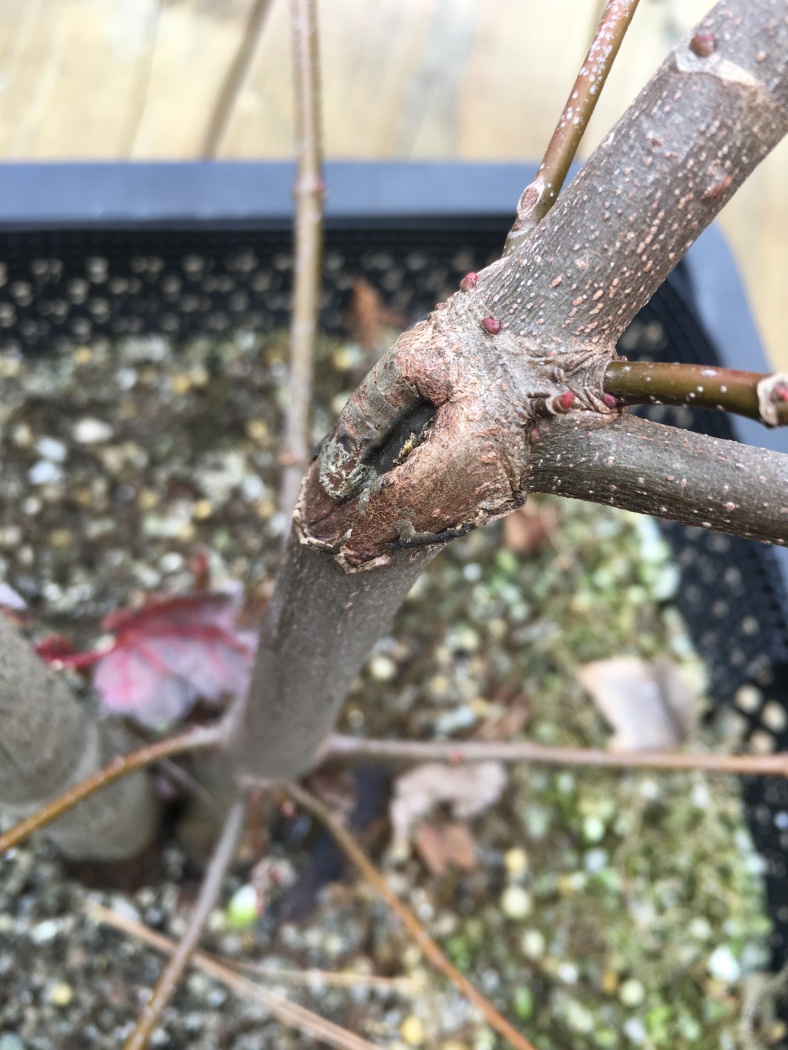
The one thing I DID do ended up terribly. I tried to wire a new leader vertically, but again, I waited too long and it was too thick. It snapped.

I covered it with cut paste but it didn’t recover.

Now several months later you can see the discoloration hinting that it’s dead around the wound.

A scratch confirms my suspicion. You can see it’s still alive a few inches up but there’s no coming back for this branch…it’s a goner.

Probably good news with the bad wire scars. I left on them on longer than I normally would have as not to disturb the healing process. Lesson learned.
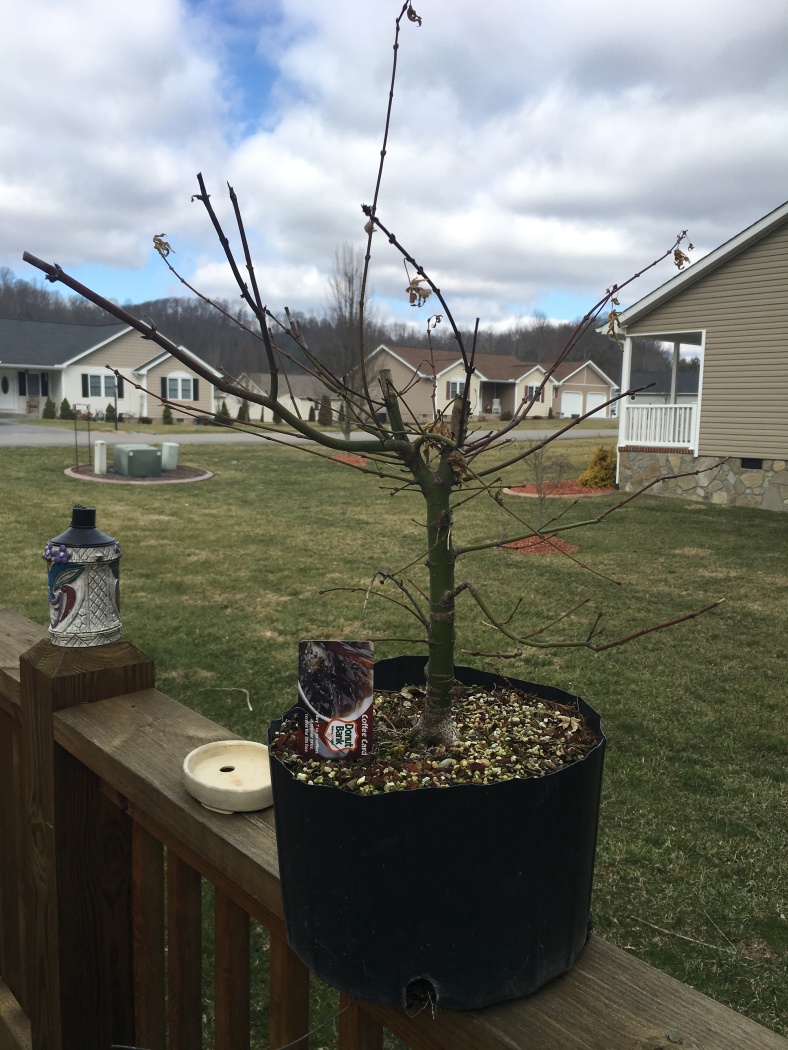
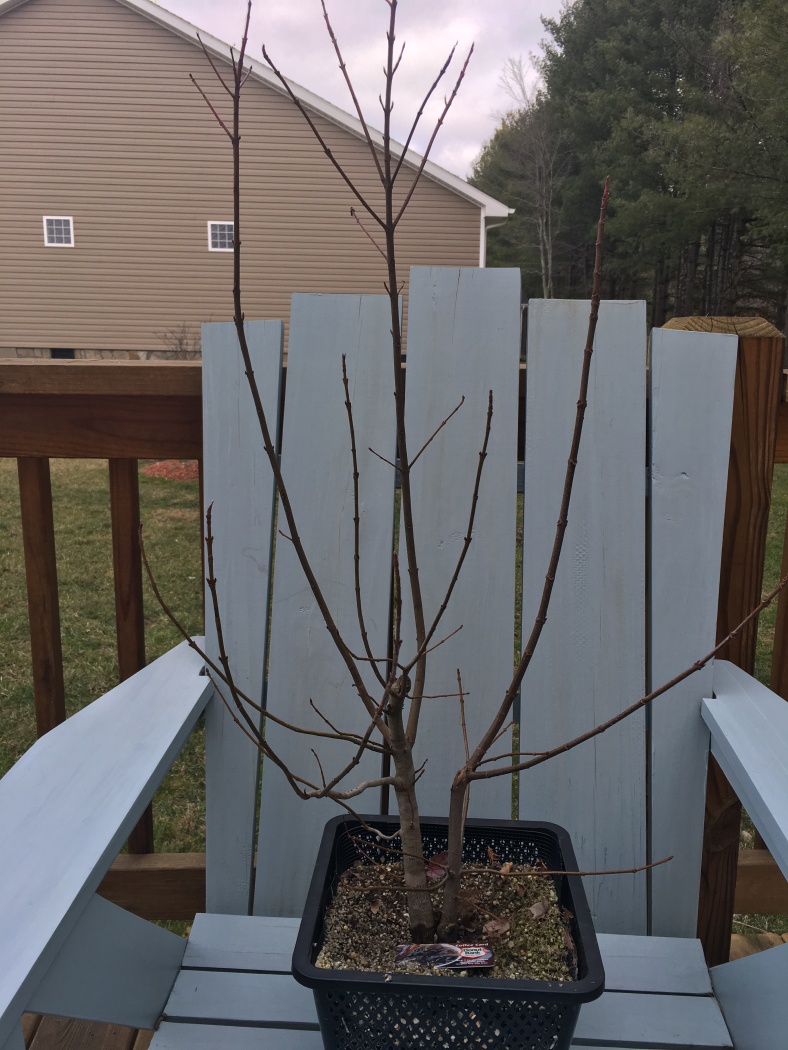
My only option now is to rechop and start again with the left trunk. Truth be told, it was too long anyway.

I left a lot of branching on the right trunk to get some life into the branches and promote some back budding. It will all come off later once I pick a new leader. Im hoping to get one below the wound on the right trunk so I won’t have to look at that scar on the front. Oh well…time will tell. We’ll check back in once the buds really start pushing.
What to do with a dead tree?
I had collected what I was hoping would eventually be an awesome bonsai many moons from now. It was a beautiful Bald Cypress taken during my Swampathon 2014 post.

Long story short, it kicked the bucket. I had hopes it would pull through but I never saw any buds when the rest of the collected trees were firing on all cylinders. I wasn’t sure why it happened and assumed it was just overstressed from collection. I felt really bad about losing it because it had a killer base with great potential. On top of that I went in and removed it from the swamp causing its demise. It may sound corny, but I felt bad about it. I wanted to do something cool with it and not just throw it on the burn pile. That would just be rude. Then a light bulb went off!
A lamp. I could make a lamp…I think.
I went and pulled it from the container and looked it over.


I wanted to use as much of the width as possible. I had envisioned sawing it off right above the root flare but it was just too damn wide. It would have been too difficult to make a completely flat cut with a handsaw.

I decided to use my table saw like any self respecting Tim Taylor fan would…more power!! The blade height game me limitations on just how low I could cut it. It wasn’t ideal since I was losing a lot of the width, but it was the easiest way to do it. To be honest, a lot of planning didn’t go into this. I just rolled with the punches.

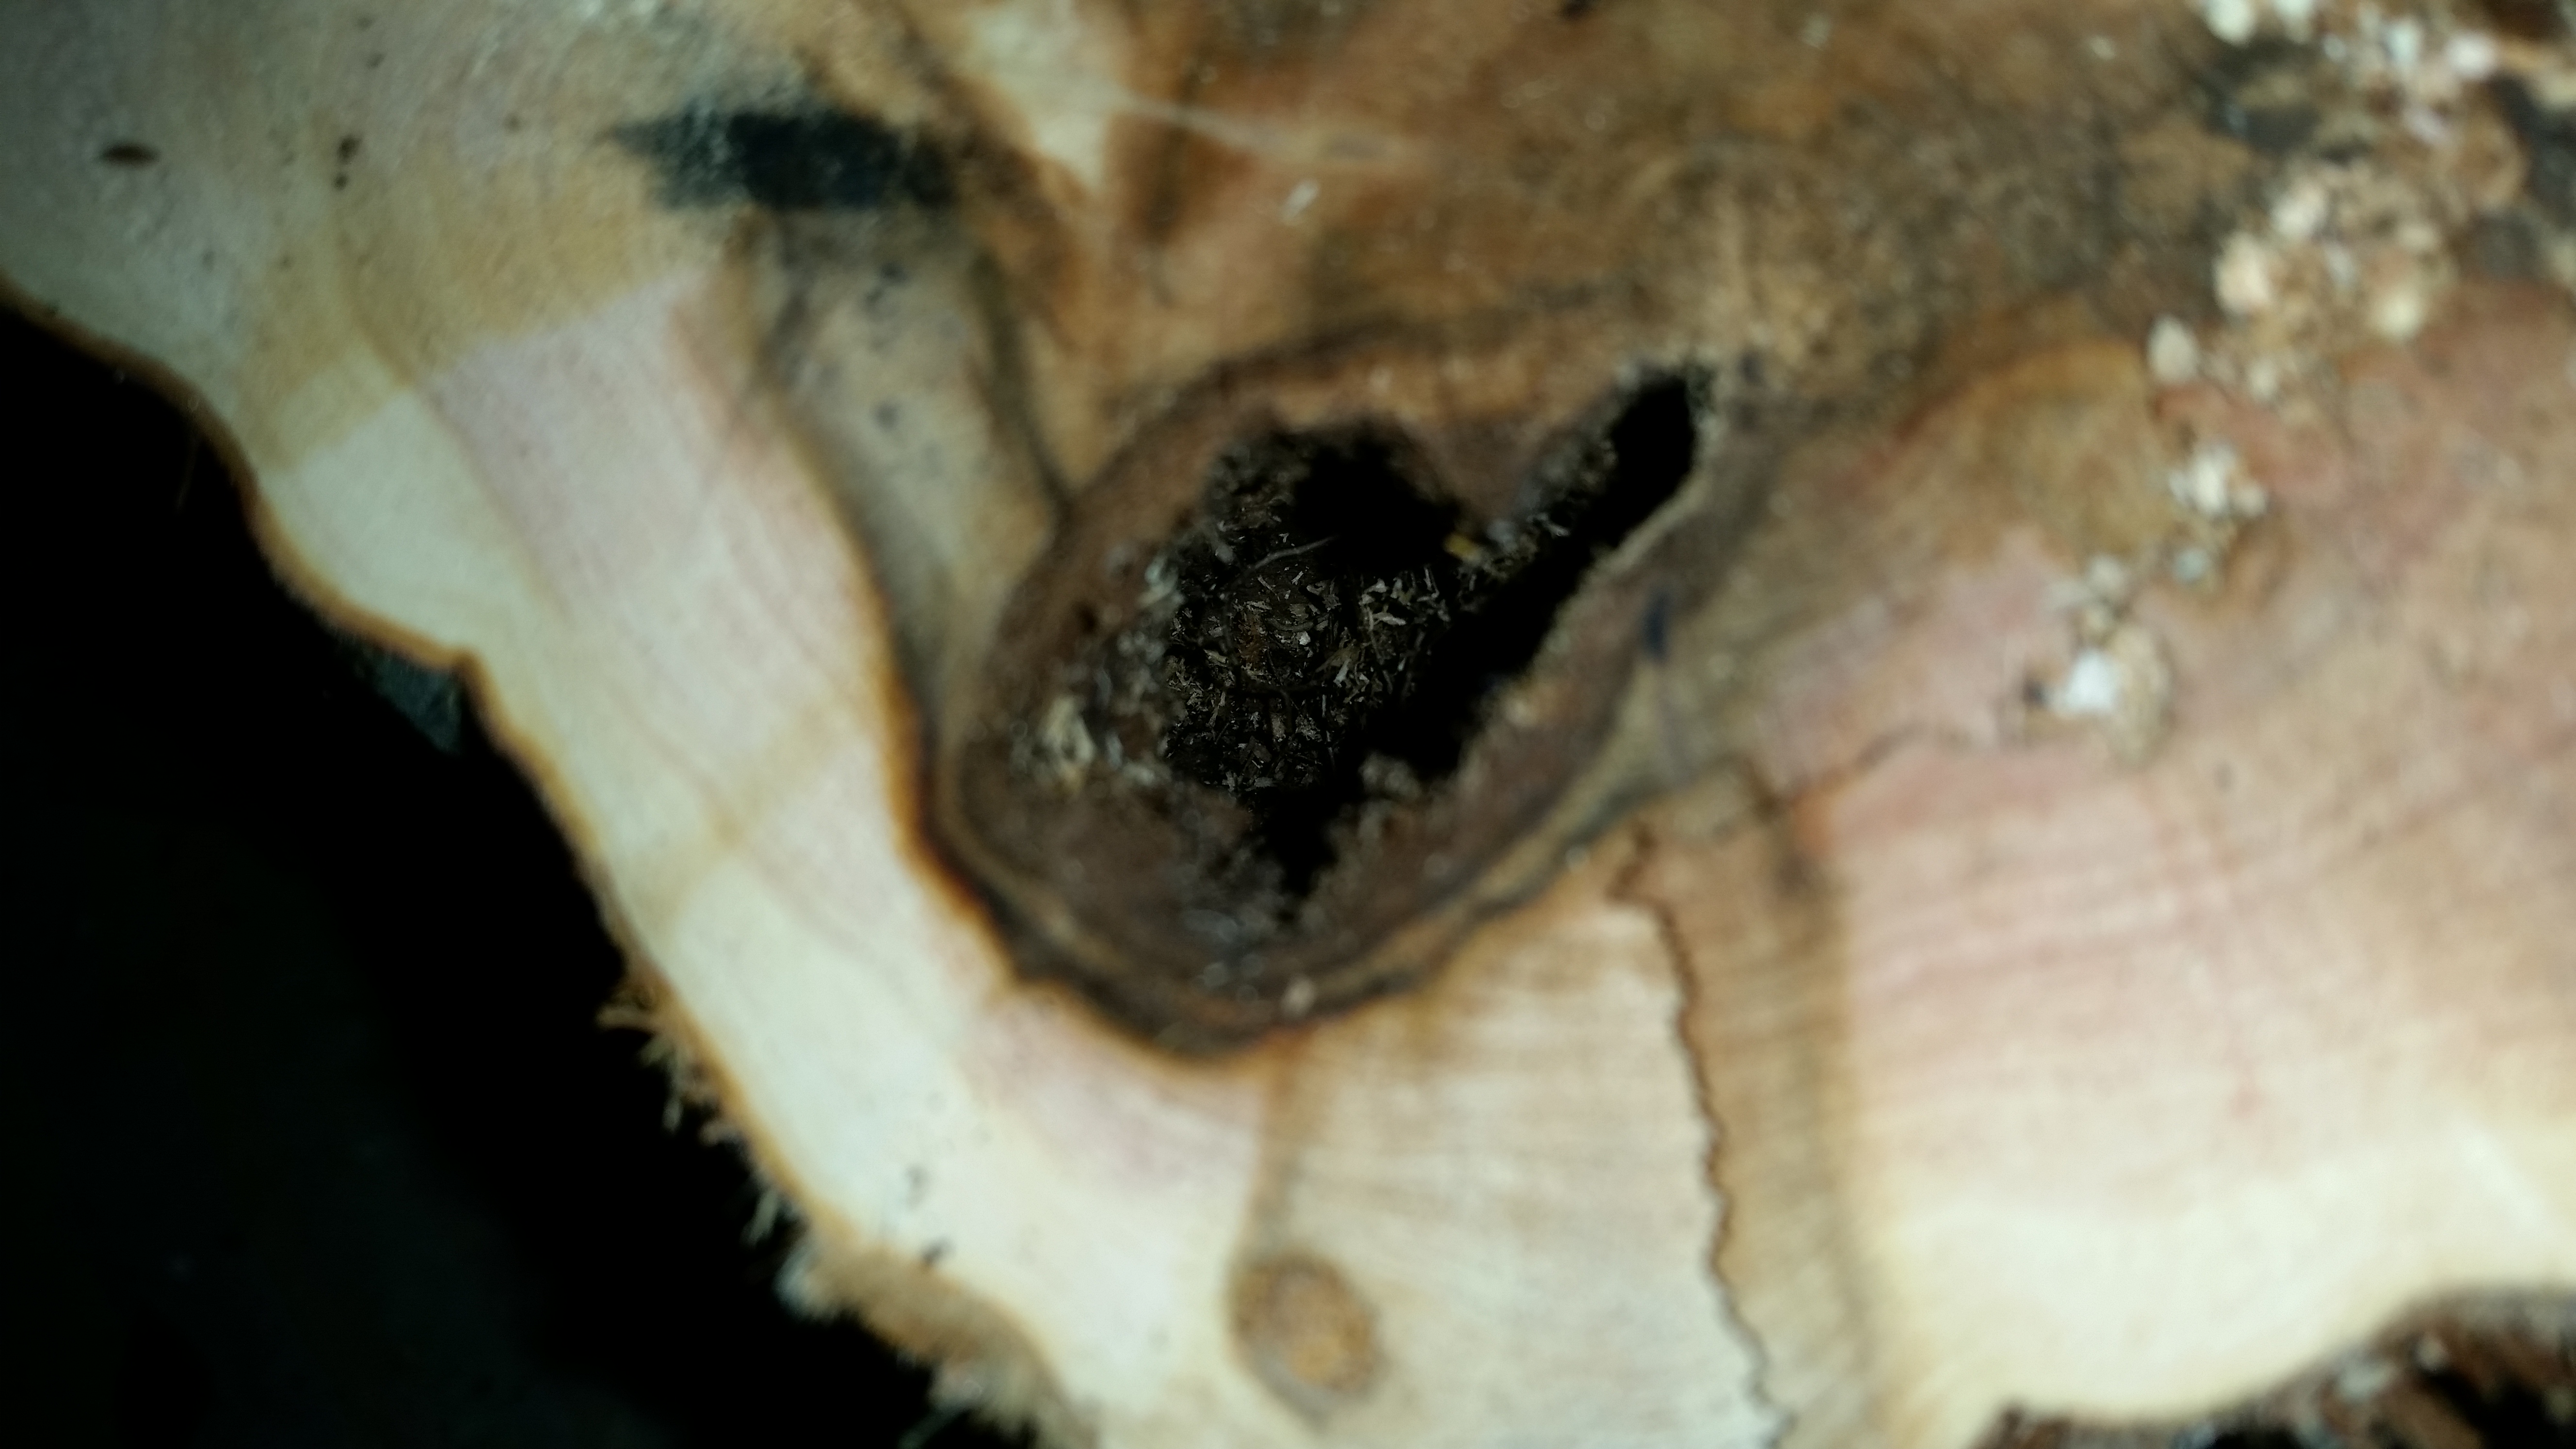
Once I cut it, I could see it had a large interior wound most likely from some type of boring insect. It went about 2-3 feet through the tree. I’m not 100% sure if that was the cause of death but it sure made me feel a lot better about losing it.
Now I just need to drill out a channel through the whole trunk section to allow me to run wire through it. The size of my bit (which I borrowed…Thanks Rick!) also limited the height of my finished lamp. This was no problem as I wanted a small desktop size lamp anyway.

The next few pictures are pretty self explanatory. I screwed some adjustable feet on the bottom, taped the wiring to a piece of wire, and shoved it through.


Once I had the wiring through, I connected it to a lamp kit and used gorilla glue to secure the bulb socket to the top. I would do this a bit differently next time as it foams up and looks messy. Since this was just a prototype I didn’t worry about it very much. Since it would be covered by the shade I just scraped off the excess and carried on.


We’re pretty much done at this point. Now to just get a shade and a bulb.

Ah, there we go! I was glad I was able to save a piece of this tree as a memory of the awesome trip.
